KD's New Players Guide

Contents:

Preface


Welcome to the game! You may have come to this because you thought it looked like Pokemon or you were looking for a game of this style. If you're looking for a game that gets you thinking strategically while playing with some cleverly designed, colourful monsters and doing interesting and challenging events then you've picked up the right game! This guide is designed for anyone who's been playing the game a few hours and made a start on the online content as well as getting through the monster league (or most of the way through). It will make sure you are not missing anything and you know what to do going forward.

F2P vs P2P:
This game can be done for free or you can make micro transactions for gems. Whether you spend or not is completely up to you (I will not advise either way in this guide) but don’t be fooled and think this game is totally designed for paying players and that you’ll never get legendaries unless you spend. The game is very fair to both types of players, with good access to gems from just playing the game but as a free player you would have to use them very carefully to get the most out of them. There is a “newcomer festival egg” available for the first week you play that is quite a good place for paying players to grab a few legendaries or a mythic to get their collection started.

The Fortune Shrine:
Since 2021 we now have a crucial offer of free gems to take advantage of: the fortune shrine. It comes every few weeks and can give you an average of 225 gems each time. This income makes legendaries very easy to get and awakening mythics becomes achievable even for free players. However, to get the full benefit of the shrine you must have 500 gems saved up at all times. Later in the game you will simply treat 500 gems as your new “0”. However, as a new player you will be faced with the difficult decision of spending your gems to improve your monster collection and progress further or saving all gems so you can reach 500. There’s no easy answer to this, but I recommend spending your gems quite freely in your first few weeks so you have some monsters to play with before then focusing on saving up. Don’t stress yourself over it too much, but once you get to 500 gems you’ll be in a much better position for the future.

3 Likes

Starting your collection


First of all your focus needs to be on building your collection of monsters. Ultimately what you'll need are gems and rare gems which you will use to hatch monsters from particularly good limited-time eggs. However, there are a large number of monsters you can gather from the early-game content including two legendaries!


Hidden island monsters

Click this arrow to see the sectionNote: To meet these monsters stand in the correct location then click on your character. This will trigger wild monster battles without moving your character (it's faster and easier).

Virabbit Glitchy (wikia link)
This is found on the tropical isles over on the far right of the map around those trees. The moveset of this monster is not great because it is low speed and the low attack stat does not work well for timestrike. However, you may find this monster better than others you have at the start.

Lunalord Lunaling (wikia link)
This is found on the frost island in the far bottom left of the map by the lake. The moveset of this monster is quite unusual and you probably won’t find a use for it later on but it can serve as a good distraction for the enemies while you try to kill them with your other monsters.

Sunlord Sunboy (wikia link)
This is found on the timber island in the very bottom right of the map by the volcano and not on the beach. This is a strong early-game monster with good damage and it survives well.

Noxdragon Noxar (wikia link)
This is found on the cursed island in the woods just beyond Kevesh, in the bottom left of them. Go to the exact spot marked by the white dot above. Beware, this monster is buffed a lot when you meet it so it’s very strong and it has a low capture rate. However, it is a free legendary! The moveset of the final form is a little restricted to link shadow teams (ones with 3+ shadow monsters out on the field at all times) but it is a very good monster.


Early monsters with 6* forms

Click this arrow to see the sectionSo far there is only one monster which does this, but it's a very strong one!

Mantisamurai Mantisamurai (wikia link)
This is found right at the beginning on central island, as shown above. It requires two crowns and grails to ultra-evolve so you’ll need to wait until you pick these up from the special ingredients section (look lower in this post to see where that is). It’s a powerful one-on-one monster you can easily build around to make strong teams and stays strong even into all the late-game when combined with bug monsters for union attack. Note: This monster takes legendary potions to bonus even when in first form.


Early monsters with 5* forms

Click this arrow to see the sectionThere are a few monsters which you pick from the islands and the dungeons in online missions that you can later turn into super epics. The first of these listed are quite easy to find because they're in the clearly labelled dungeons throughout the islands but they can be challenging battles when you first reach them so be sure to come back and collect the monsters when you can.

It is highly recommended you potion these to +9 with epic potions before evolving them into their super epic form. As a newer player you may choose to make one while it is +0 then later catch another to make it +9 and evolve it. Super epic potions are much rarer than epic potions!

Thorhoof Sparkhoof (wikia link)
This is found on the central island in the dungeon shown above. The moveset of this monster is not as good as others but you may find this monster better than others you have at the start.

Rosempress Prinrose (wikia link)
This is found on the desert island in the dungeon shown above. This has a powerful sleep move which can be used to control the battlefield. Until you get legendaries with sleep moves this is an incredibly good budget option. It can deal very high damage with both dreamhunt and sneak attack.

Demontoad Frogue (wikia link)
This is found on the tropical isles in the dungeon shown above. The moveset is restricted to only link shadow teams (ones with 3+ shadow monsters out on the field) but the reward is great. Link 250s megabomb kills practically everything and it can shield itself regularly to pass the time. Enrage teammate boosts the target’s attack by +100% while setting their defence to 0, which can be very good for some monsters.

Megamummat Wooly (wikia link)
This is found on the frost island in the dungeon shown above. The moveset is not the best but solo desperate stampede works brilliantly with hold ground so careful skipping turn can easily line that up.

Electricheetah Zapcat (wikia link)
This is given to you at the start of the game but if you delete it or want another you can collect it on the Timber Island as shown above. This monster is very useful in 3* form through the story with stunning entrance, accelerate team and protector killer. The 5* form beefs up the stats and makes it slightly better at killing.

Twighoul Twiggy (wikia link)
This is found in the online story in chapter 2. In the water dungeon the wild battles may contain a Twiggy you can catch. The moveset is an insane counter to protectors but it struggles to get kills in other scenarios. It is great to put in your team for battles against protectors. Evolving this monster takes a lot of a rare ingredient.


Other important island monsters

Click this arrow to see the sectionThere are many great monsters to get from the islands but here I'll point out a small number of the very best.

DullakhanNightmare Dullakhan and Nightmare (Dullakhan / Nightmare)
These are both found on the timber island in the same place (although the first form of Nightmare can be found on the frost island before). They have a move where they sacrifice the other one to create a +9 bonus Nightrider Nightrider, after 100s has passed. Dullkhan has high speed and one-on-one so can easily put many enemies to sleep then skip turns until polymerization is ready to use. You then get the Nightrider legendary plus whatever monster is next in your team entering the battlefield, while the enemies are still sleeping. With Nightrider it is often best to use survivor to lower its HP below 100%, then use instant overwatch and lifeflip so it’s ready to use desperate all on its next turn. This lines up nicely to kill all the enemies shortly after they wake up. Needless to say, this is a very powerful setup to use for a lot of the early stages of the game and you can combine it with survivor monsters to make the most of the time passed with one-on-one as well as a good monster entering from 5th position in your team.


There are many other monsters available in the online section. Limited-time events will often have super epics as a reward for getting past a certain stage. Make sure you get these from each event as soon as you have a strong enough team for getting up to that point. Otherwise, there are some monsters you can go collect from parts of the online section. First, go take a look at “monster hunting”…

Monster hunting

This section offers some missions which give you monsters.

  • “The Six Trials” gives you a well-designed epic in each element. I highly recommend you do it each day to get them all +9 (takes 60 days).
  • “Four Guardian Beasts” gives you all the starter monsters and can be completed multiple times for a 60% chance to get another copy. I highly recommend you do this as soon as possible because the starters are great monsters for the early stages of the game. You will need multiple copies of each starter (9 in total of each) so you’ll need to do this a lot. You can enter every 6 hours.
  • “The Legend of Chronox” gets unlocked after you become grand champion and gives you access to another free legendary! Chronox takes a lot of work to evolve but it’s a versatile sweeper (it kills things) that you can use in many teams.
  • “Even Elian Can Find Love” gets unlocked after you become grand champion and features some hard battles but after you get through it you get Bitterbeast which is one of the best super epics in the game which you can use in practically every team.

Special ingredients


To evolve the starters into their final, super epic, forms you must go to the special ingredients missions. These are four missions which the game cycles through every few days...

The two missions on the top offer access to some rare ingredients. You should try to complete them each time they are available. The elemental dungeon offers battles which are a very efficient way to get ingredients for the tickets you spend.

However, the bit I want to focus your attention to is “Chambers of the Statue”…

This event has four battles, one against each of the super epic forms of the starters. The battles are against 8 of that monster with them buffed quite a bit. They may seem tricky at first, but the enemies have no protection to stun so use the monsters you got from the islands with “stun burst” and you should be able to stun the enemies lots then kill them with ease. Aganst the water and earth battles it is a good idea to use poison so their stun revenge will not trigger (they have both hold ground and stun revenge - the poison tick will kill them past hold ground).

Completing all four battles will get you a Moalith, the ingredient you need to make one of these four or to evolve Chronox. You will ultimately need two copies of each starter in their 5* form because to evolve Chronox from 5*->6* he needs the super epic starters as ingredients. For that reason, don’t stress about using potions on your first couple of starters you evolve but I do recommend you go read the first post of my Bonus Potions and Entrance Speed guide where I have the important note for newer players about the starters.

For this guide I’m just going to quickly recommend the starters in the order:

  1. Galvbane - a brilliant sweeper for all situations
  2. Wolfrozor - a good damage dealer that survives well
  3. Viridizardon - a useful accelerate team that can kill things and survive
  4. Chronozar - a good stun immune sweeper
  5. Rexkong - a glass cannon that is mainly useful for PvP (do earlier if you want for PvP)

That’s just my personal recommendation. Do them in whatever order you like, but definitely Galvbane first.

Rookie Missions

When you first go online there will be a button on the main screen called “Rookie Missions” which will have a few things that are very easy to complete. Get them done and grab the rewards. Doing all of them will give you the super epic Leoronix, a holy protector with stun absorb. It will also unlock achievements, which you can read about later in this guide.


Newcomer login bonus

If you’ve come to the forum and are reading this thread then it’s likely you’ve been playing the game more than a week but if it’s not too late then I highly recommend you keep logging into the game each day for your first week. You will need to click the “newcomer login bonus” button in the middle at the bottom on the online screen to claim it each day. There are gem and rare gem rewards for doing so and on day 5 you will get the super epic monster Ventokaizer, a storm support/sweeper with desperate double, purify, hold ground and the powerful shocking entrance. The rewards are shown in this screenshot here:


Friend Chest

Here you can get a wide variety of rewards. Most commonly you will get small amounts of silver and youth fruit. However, occasionally you get an epic or super epic monster! There are even a few monsters that are unique to the friend chest. Don’t forget to grab your 10 free friend chests each day. The rewards you get will stack up over time.

3 Likes

Ultra-Evolving monsters


All the monsters which are epic, super epic, legendary or mythic in this game must ultra-evolve to reach their final form. The steps in order to do this are:
  1. Use the 60 training sessions already on the monster.
  2. Get youth fruit from the online mission.
  3. Add more training sessions to the monster and get some more training points.
  4. Train to 100%.
  5. Gather the ingredients and silver from online missions.
  6. Evolve in the ultra-evolve screen.

Training is shown to you right at the start of the game. The youth fruit mission can be found in the ultra-evolve section online, as well as the mission for getting silver. Do these to get the fruit/silver you need. Ingredients are all obtained from the relevant ingredients missions (see below).

To get to the ingredients missions go to the online screen and hit the bottom left icon called “Ultra-Evolve Quests”. You will be greeted by this screen…

From here you can see the youth fruit and silver mines missions. Each of these will cost a gold key to open for one hour. Keys come back after 12 hours so don’t worry too much about using them. The special ingredients missions are something you should check out. Every few days a different one is open and they offer the more rare ingredients or better places to farm. The top left button will take you to the ingredient missions…

Here it is quite self-explanatory. It costs a silver key to open one of these for an hour, which will again come back in 12 hours. To unlock these missions you need to be a certain hero rank. This is especially notable for the pyramid mission because this may stop you from evolving some monsters early on. However, being locked out is actually just because you don’t have enough max tickets to even do the mission one time.

For training your monsters it typically takes this amount:

  • Mythic and Legendary monsters: 140 training sessions total (+80 from youth fruit)
  • Super epic monsters: 100 training sessions total (+40 from youth fruit)
  • Epic monsters: 80 training sessions total (+20 from youth fruit)

Note: If you use auto-training then it will typically take a few more training sessions for each. However, auto-training is much faster so it’s recommended. It gets unlocked at hero rank 20.

2 Likes

Achievements


Achievements are unlocked after you complete the rookie missions. Here you get mainly gems and rare gems for completing parts of the game and levelling up your hero rank. Be sure to check back in regularly to see if there's anything you've completed.

Achievements are broken down into four sections:

  • Hero Rank
  • Main Story
  • Online Section / Limited Event
  • Icons


Main Story
In the rewards given out for doing the main story there is one of each rare ingredient, meaning that you will have what you need to evolve a legendary (e.g. Noxdrake → Noxdragon). This is something easily missed by many players. Otherwise, completing the post story episodes give a bunch of extra gems here.


Hero Rank
In this section you will earn a huge number of gems and rare gems for increasing your hero rank. The later levels are especially generous and are a big reason why you may want to grind for exp to level up past level 150.


Online Section / Limited Event
This section has a lot of stuff you cannot complete when you first start the game. The online section pages are what you’ll get first, giving you rewards for completing the online story, side quests and story events. Completing limited-time events is not something you can expect to be doing straight away. However, “The Lost Crown Jewels” and “Chambers of the Statue” can be done early on. They are in the special ingredients section and come out regularly. If you want the gems then make sure you’re completing them each time they come out.


Icons
This section is something you probably want to check in on from time to time. You unlock icons from reaching certain milestones, collecting certain monsters and other such requirements. I have another guide detailing all the icons in the game which you can go check out if you wish: KD’s Profile Icon & Background previews. Once an icon has been unlocked here in the achievements the question mark will be lit up and you can click it to collect. Equipping your icon can be done from the main online screen by clicking in the top right where it shows your current icon.

1 Like

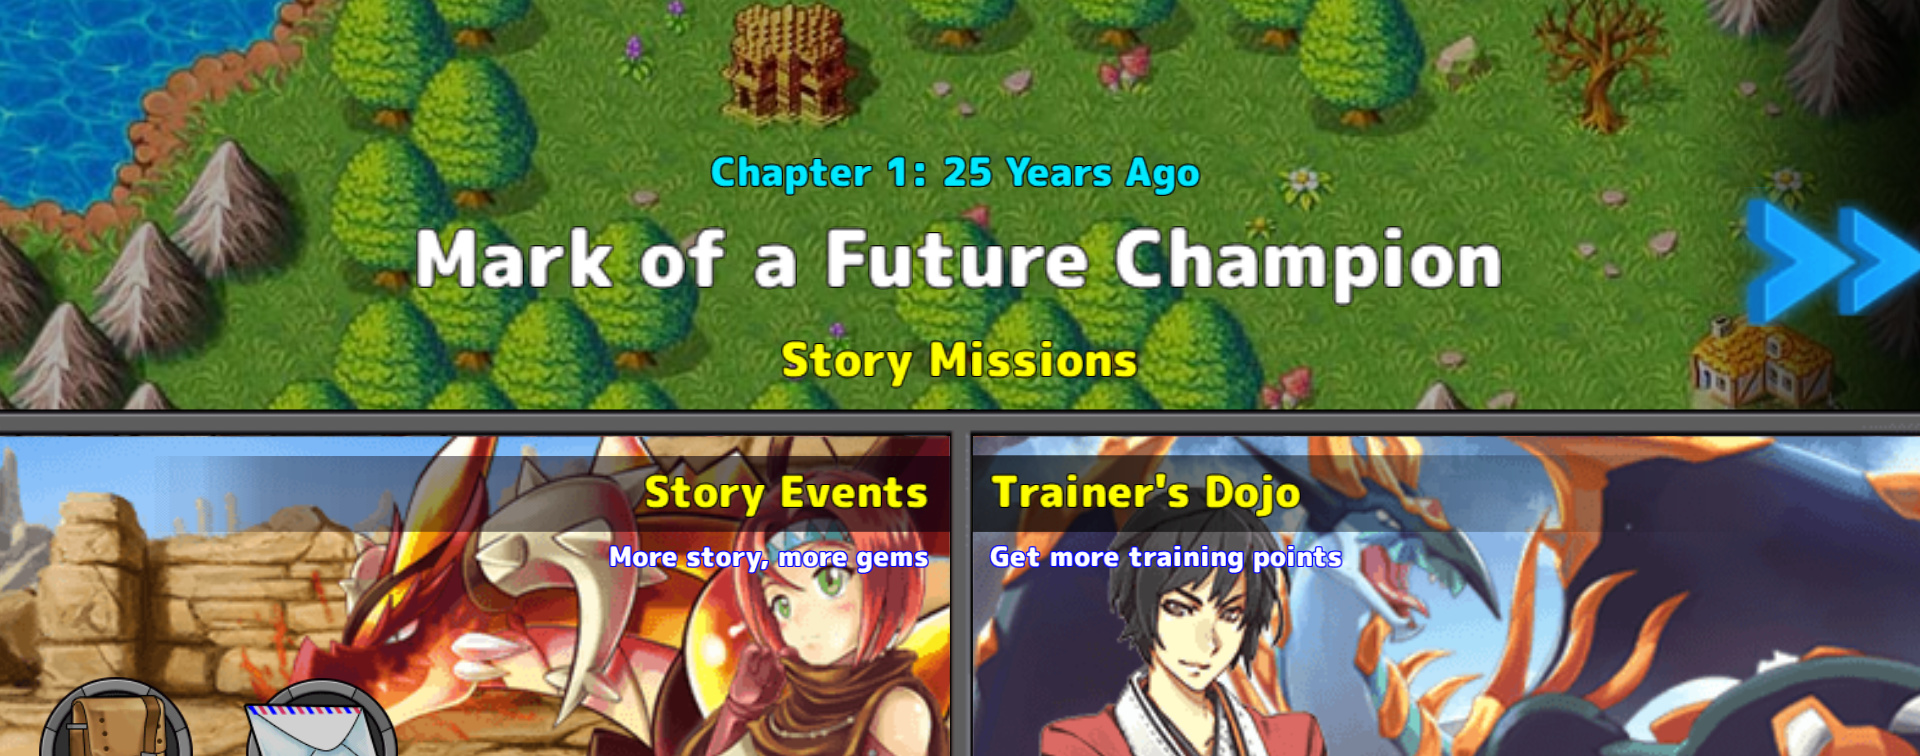
Online story/missions and Hero rank

Hero Rank

To begin with your maximum number of tickets are very low and so is your team cost. It’s very important to level up your hero rank and aim for level 120, where you will gain the max team cost of 206. At this point you will also have 103 max tickets, which will make it easier to participate in events that require constant use of your tickets.

The first missions of the online story (chapter 1, 2 and 3) all offer very low amount of experience. However, chapter 4 gives the best exp/ticket ratio out of any missions in the game (excluding some limited-time events). I would highly recommend that you get through chapters 1, 2, 3 and 4 as early as you can. Once you reach the shadow temple in chapter 4 you unlock the best mission for exp. The final battle here gives you 2440 exp for 9 tickets.

After reaching this mission I recommend you only do one online story mission per day. Each day the newest story mission will give you double exp. You can make the most of this by doing it then waiting a day for the next mission to become double exp. There is no reason to rush through the online story. Chapter 6 and onwards become very challenging and you will need a good team to do the battles.

If you want to see the full breakdown of exp requirements and the benefits from hero rank you can see them in KD’s Hero Rank guide.

Trainer's Dojo

This has a few battles that teach you about some of the mechanics in the monsters you collect on the islands. I personally found this a great thing to do as the first bit of online content while going through the islands. These training missions cost no tickets to enter but reward you with 60 exp and 1.5 training points. They’re incredibly useful for getting yourself training points when you’re in need and you can grind them for exp to increase your hero rank (the last stand section, first battle is the best for this). Grinding this battle is an effective way to level up to begin with and will help you rush through the start of the online content, if you’re willing to spend the time replaying it.

Side Quests

These can be found in the “Story Events” and are much like the online story with a gem every few battles. They give more exp than the online story to begin with but ultimately become less efficient. I recommend you delay playing these missions until you have reached chapter 4 in the online story, unless you get stuck before that point.

Other Stories (e.g. The First Ones, Divine Visitors, etc.)

These are story events that have come into the game as limited-time content and have been re-released in this section. Like all limited-time events, the early battles in these are easy to finish and can be a good place for you to grab some gems and other rewards. To fully complete them you will need to have a strong team but they are a great place to pick up rare ingredients which you need to evolve legendaries.

1 Like

Playing strategically


I write a lot of guides on this forum that look deeper into parts of the game and offer lots of useful information or tips. Killerdog’s guides is my main thread with links to all that I’ve written. Go have fun playing the game but if you want to learn more than follow that link and find out more about whatever else interests you. The rest of this post will give you a little bit of food for thought about using your gems and team building and general tips.

In-game help
In the news section on the online screen it will have information about all the current content. However, go near the back and you’ll see a page titled “Useful tips for rookie players”


I highly recommend you read through these carefully, coming back to it a couple of times more to make sure you remember it all. A particularly useful thing is checking monster skills during a battle by clicking their icon on the time bar. This helps you learn their movesets and plan ahead with what they are likely to do in the battle. Additionally, be sure to click on all the “i” buttons on pages that have them. There are many small details to aspects of this game or the events that can be overlooked but are explained here.

Monster analysis is a very extensive source of useful information about monsters that you will find in the monsterdex. If you ever want to learn more about how a monster works or how best to utilise it then you should read its analysis there.

Increasing hero rank
In an earlier post I wrote about working on improving your hero rank by getting to chapter 4 then using the shadow temple final mission to level up. It gets very boring playing this mission over and over but it is the most efficient. Another good mission to play for levelling once you’ve got 60+ max tickets is the pyramid ingredient mission. This is a very fast mission to complete and gives you roughly half the exp for the tickets compared to the chapter 4 mission. This may seem unappealing but I have personally found it a very easy way to dump my tickets somewhere quickly and gain a benefit (exp and pyramids, maybe even a Cryptamid - a rare ingredient for legendaries).

Here are all the best options:
Chapter 4, shadow area, final battle = 271 exp/ticket
Trainer’s dojo, last stand, first battle = infinite (just time)
Pyramid mission = 133 exp/ticket
Elemental dungeon = 120 exp/ticket
Mouth missions = 140 exp/ticket
Chapter 7, lost area, final battle = 245 exp/ticket

Monster archetypes
Poison, sleep and stun are the three core archetypes in the game. You will see them on many of the monsters from the islands and, going forward, the stun monsters are the most reliable for helping your teams work effectively. For example, you can have a couple of monsters built to kill the enemies then use a couple of stun burst/bomb monsters to stun the enemies before you kill one and keep killing the new one that enters while the other enemies cannot do anything. As you collect more monsters you will have access to many more possibilities as well as extra archetypes like link, raw, detox and stealth / sneak attack. Be sure to think carefully about each one and what it might be able to offer your team. Building your team around a particular one (e.g. poison) can work well because the monsters support each other or, like described above, you can utilise stun to control the enemy team and kill monsters with bloodthirst rather than using timestrike on the stunned monsters. There are certain combinations which don’t work, like poison and sleep at the same point in the team. Be wary about putting any monster with poison revenge nearby monsters that want to put the enemies asleep.

Team building
It can be hard to build a team with proper synergy until you have a large collection of monsters. What I would recommend is creating a team that has two sections, the first half focusing on one archetype and the second on another. Where you have monsters that you want to keep alive place a protector or two. If you find a particular section is too weak to stun then put a stun absorber like Leoronix or Bitterbeast at that point. Stun absorbers should typically be placed every 6-8 monsters in your team, if you want it to be reliable. Ultimately what you should do as you gain some more monsters is revolve your team around the strongest mythics, legendaries and super epics you get. Many legendaries have blood moves which can be charged and become one-shots on any enemy.

Using gems
If you’re going to be spending money on gems then what is probably best is thinking in the long-term. I recommend you go read one of my guides about eggs and using gems. However, if you’re a free player then I believe your focus should be on getting as many legendaries as possible to begin with. What this means is you only want to roll when there is an egg with 1.5x chance on legendaries (6.1%) and with featured monsters that are not too restricted in their use. Once you hatch a featured legendary it’s often a good time to stop so you don’t hatch the same one again. These “festival eggs” with boosted chance typically come every few weeks, especially on seasonal celebratory times that are often seen in universal games like Christmas, New Year, Easter, etc. You should only hatch eggs in 10-packs, no matter how tempting it might be to spend your gems before, because you get a rare gem as a bonus for doing so. 5 rare gems can be used to get a guaranteed super epic, legendary or mythic and all the super epics in the rare egg pool are ones with unique, typically stronger movesets.

Further down the line (once you’ve got a small collection of legendaries) you can start rolling in eggs where you like the featured monsters but I would again recommend you stop rolling once you’ve hatched one of the featured. There will always be opportunities in the future to hatch the ones you’re missing when they’re featured with other monsters you do not have.

Knowing which monsters are good
There is a thread on this forum which rates all the monsters in the game for both the general content and for PvP. It’s known as the Neo Monsters tier list and while I’ve been put in charge of keeping it up to date it’s a community project and many give input to rate the new monsters coming in. If you want to know how good a monster is then it’s probably the best place to go look. I’ve been trying my best to write all updates in full (even more so than Buckingham did) so it creates an archive of information about particular monsters as time has gone on. You can use the search in topic function for a monster to read all the references to it there and why it’s been positioned where it has.

2 Likes

Please leave any comments you have in this thread here:
https://www.neomonstersforum.com/t/feedback-thread-for-killerdogs-guides/15934

See my main thread for more information/tips:
https://www.neomonstersforum.com/t/killerdogs-guides/15936/1